ARCHICADBIMPython開発
Archicadの情報からガントチャートを作る
2026.02.02
2024.02.14
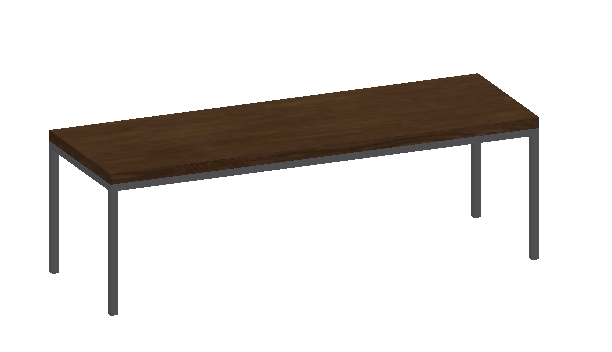
入門編③では実際にテレビ台のオブジェクトを作りながら、GDLの機能や使い方を説明したいと思います📚
※この記事ではGDL作成画面の操作など、基本的な内容は説明していません。入門編①・②では細かく説明していますので、参考にしてください!
まずは、コード内で使用するパラメータ(変数)を作成します。
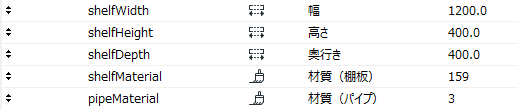
【変数名 – 名前 – 値タイプ – 初期値】
・shelfWidth – 幅 – 長さ – 1200
・shelfHeight – 高さ – 長さ – 400
・shelfDepth – 奥行き – 400
・shelfMaterial – 材質(棚板) – 159
・pipeMaterial – 材質(パイプ) – 3
ユーザーが値を変更する必要のない変数は、パラメータ画面で追加せず、マスタスクリプトに直接書いていきましょう✍
!<マスタスクリプト>

!棚板厚み
boardThickness = 0.03

!角パイプ幅
pipeWidth = 0.02今回作成するテレビ台の構成要素は、構造部材であるパイプと、棚板です。
棚板は1枚だけですが、パイプは複数本必要ですよね。
このように、同じ形状が複数回登場する場合、「サブルーチン」を使用することで、何度も同じコードを書く手間を省き、分かりやすく表現することができます。
サブルーチンは下記のような構造で使用します。
!<3Dスクリプト>

gosub "サブルーチン名"

end

"サブルーチン名":
    !サブルーチンコード
return
これだけ見ても分かりづらいと思いますので、実際にパイプのサブルーチンを作成し、配置するところまでを試してみましょう😉
!<3Dスクリプト>

!パイプ
gosub "PIPE_Z"
addx shelfWidth-pipeWidth
gosub "PIPE_Z"
addy shelfDepth-pipeWidth
gosub "PIPE_Z"
addx -(shelfWidth-pipeWidth)
gosub "PIPE_Z"
del 3

!-------------
end
!-------------

!サブルーチン---------------------------------------

!パイプ
!Z軸方向に伸びるパイプ---------------
"PIPE_Z":
material pipeMaterial
PRISM 4, shelfHeight-pipeWidth-boardThickness,
	0, 0,
	0, pipeWidth,
	pipeWidth, pipeWidth,
	pipeWidth, 0
return
!----------------------------------------
3Dビューで確認すると、4本のパイプが配置されていますね!
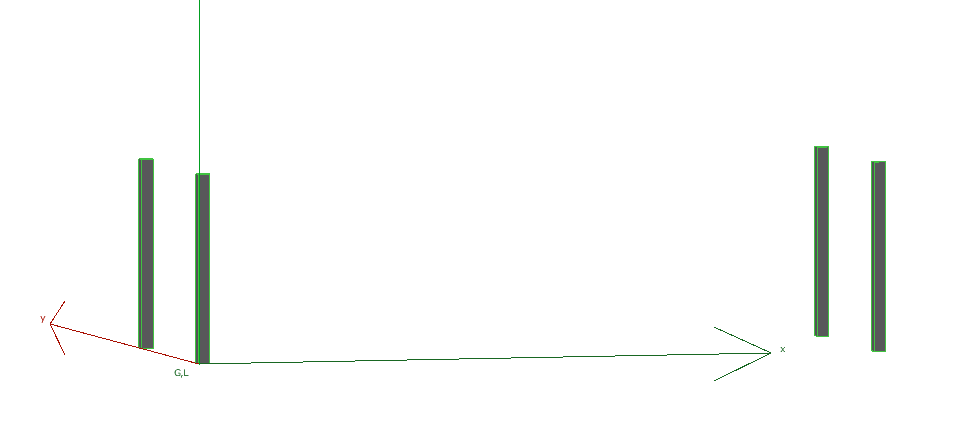
“PIPE_Z”のサブルーチンでは、PRISMコマンドを使って1本の角柱を作成しています。
gosub “PIPE_Z”で1本目のパイプを配置し、ローカル座標を移動させながら2~4本目のパイプを配置していることが分かります💡
パイプの配置位置は先ほど作成したパラメータの値を使用しているので、ローカル座標の動きが分からなくなってきた方は一つ一つ順を追って確認してみてください。
Z軸方向に伸びるパイプが配置できましたが、構造部材としてX軸方向、Y軸方向に伸びるパイプも必要なので、同様にサブルーチンを使用して配置していきます。
!<3Dスクリプト>

!パイプ
gosub "PIPE_Z"
addx shelfWidth-pipeWidth
gosub "PIPE_Z"
addy shelfDepth-pipeWidth
gosub "PIPE_Z"
addx -(shelfWidth-pipeWidth)
gosub "PIPE_Z"
del 3

roty 90
addx -(shelfHeight-boardThickness)
gosub "PIPE_X"
addy shelfDepth-pipeWidth
gosub "PIPE_X"
del 3

rotx -90
addz pipeWidth
addy -(shelfHeight-boardThickness)
gosub "PIPE_Y"
addx shelfWidth-pipeWidth
gosub "PIPE_Y"
del 4

!-------------
end
!-------------

!サブルーチン---------------------------------------

!パイプ
!Z軸方向に伸びるパイプ---------------
"PIPE_Z":
material pipeMaterial
PRISM 4, shelfHeight-pipeWidth-boardThickness,
	0, 0,
	0, pipeWidth,
	pipeWidth, pipeWidth,
	pipeWidth, 0
return
!----------------------------------------

!X軸方向に伸びるパイプ---------------
"PIPE_X":
material pipeMaterial
PRISM 4, shelfWidth,
	0, 0,
	0, pipeWidth,
	pipeWidth, pipeWidth,
	pipeWidth, 0
return
!----------------------------------------

!Y軸方向に伸びるパイプ---------------
"PIPE_Y":
material pipeMaterial
PRISM 4, shelfDepth-(pipeWidth*2),
	0, 0,
	0, pipeWidth,
	pipeWidth, pipeWidth,
	pipeWidth, 0
return
!----------------------------------------
3Dビューで確認してみましょう。
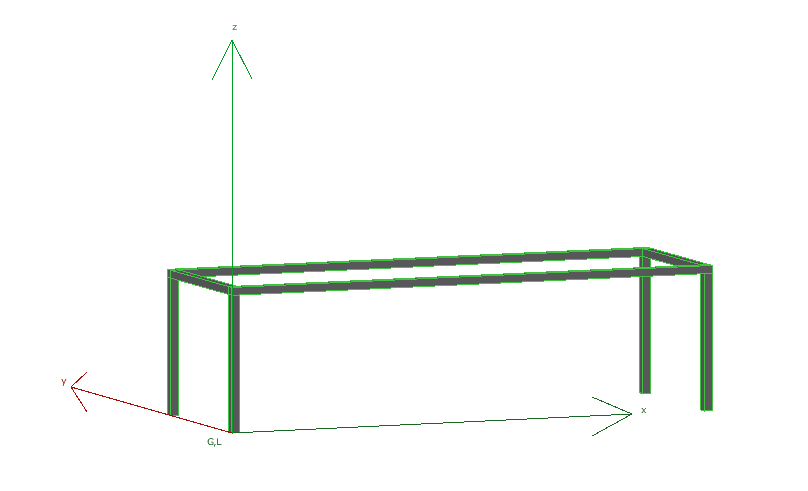
パイプが正しく配置されていますね!
ちなみに、X軸方向・Y軸方向に伸びるパイプはサブルーチン内ではZ軸方向に伸びるパイプと同じ向きで作成し、配置する前にrotコマンドで回転させています。正解があるわけではありませんが、他のサブルーチンとルールを統一させたり、形状を作成しやすい方向でコードを書いて、配置前に位置や向きの調整を一括で行う方がより分かりやすいコードになると思います😊
また、今回はX軸方向・Y軸方向・Z軸方向と分けてサブルーチンを作成しましたが、パイプのサイズは同じなので、高さの部分を変数にして部材ごとに値を変更すれば、一つのサブルーチンでパイプを配置することもできそうですね。余裕のある方は是非試してみてください✨
パイプが配置できたので、次は棚板のコードを書いていきましょう。
!<3Dスクリプト>

!棚板
addz shelfHeight-boardThickness
gosub "BOARD"
del 1

!-------------
end
!-------------

!サブルーチン---------------------------------------

!棚板------------------------------
"BOARD":
material shelfMaterial
PRISM 4, boardThickness,
	0, 0,
	shelfWidth, 0,
	shelfWidth, shelfDepth,
	0, shelfDepth
return
!----------------------------------------
これで、テレビ台が完成しました👏
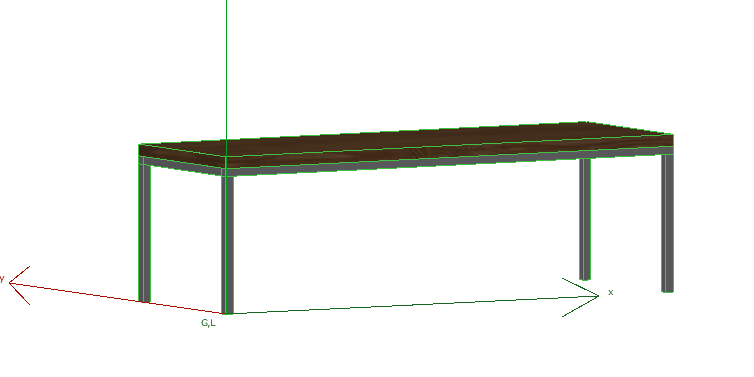
四隅の位置にホットスポットを追加しておきましょう。
!<3Dスクリプト>

!ホットスポット
hotspot 0,0,0
hotspot shelfWidth, 0, 0
hotspot shelfWidth, shelfDepth, 0
hotspot 0, shelfDepth, 0
hotspot 0,0,shelfHeight
hotspot shelfWidth, 0, shelfHeight
hotspot shelfWidth, shelfDepth, shelfHeight
hotspot 0, shelfDepth, shelfHeight
3Dスクリプトの全体は以下のようになります。
!<3Dスクリプト>

!パイプ
gosub "PIPE_Z"
addx shelfWidth-pipeWidth
gosub "PIPE_Z"
addy shelfDepth-pipeWidth
gosub "PIPE_Z"
addx -(shelfWidth-pipeWidth)
gosub "PIPE_Z"
del 3

roty 90
addx -(shelfHeight-boardThickness)
gosub "PIPE_X"
addy shelfDepth-pipeWidth
gosub "PIPE_X"
del 3

rotx -90
addz pipeWidth
addy -(shelfHeight-boardThickness)
gosub "PIPE_Y"
addx shelfWidth-pipeWidth
gosub "PIPE_Y"
del 4


!棚板
addz shelfHeight-boardThickness
gosub "BOARD"
del 1


!ホットスポット
hotspot 0,0,0
hotspot shelfWidth, 0, 0
hotspot shelfWidth, shelfDepth, 0
hotspot 0, shelfDepth, 0
hotspot 0,0,shelfHeight
hotspot shelfWidth, 0, shelfHeight
hotspot shelfWidth, shelfDepth, shelfHeight
hotspot 0, shelfDepth, shelfHeight

!-------------
end
!-------------


!サブルーチン---------------------------------------

!パイプ
!Z軸方向に伸びるパイプ---------------
"PIPE_Z":
material pipeMaterial
PRISM 4, shelfHeight-pipeWidth-boardThickness,
	0, 0,
	0, pipeWidth,
	pipeWidth, pipeWidth,
	pipeWidth, 0
return
!----------------------------------------

!X軸方向に伸びるパイプ---------------
"PIPE_X":
material pipeMaterial
PRISM 4, shelfWidth,
	0, 0,
	0, pipeWidth,
	pipeWidth, pipeWidth,
	pipeWidth, 0
return
!----------------------------------------

!Y軸方向に伸びるパイプ---------------
"PIPE_Y":
material pipeMaterial
PRISM 4, shelfDepth-(pipeWidth*2),
	0, 0,
	0, pipeWidth,
	pipeWidth, pipeWidth,
	pipeWidth, 0
return
!----------------------------------------

!棚板------------------------------
"BOARD":
material shelfMaterial
PRISM 4, boardThickness,
	0, 0,
	shelfWidth, 0,
	shelfWidth, shelfDepth,
	0, shelfDepth
return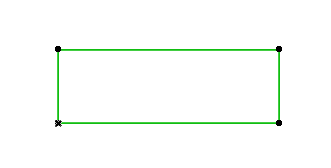
!----------------------------------------平面図ビューでも正しく表示されるように2Dスクリプトも書いておきましょう。
今回のテレビ台は平面図上では直方体に見えるはずなので、RECT2コマンドを使用します。
!<2Dスクリプト>

RECT2 0, 0,  shelfWidth, shelfDepth
3D同様、四隅の位置にホットスポットを追加すると、2Dスクリプトの全体は以下のようになります。
!<2Dスクリプト>

RECT2 0, 0,  shelfWidth, shelfDepth

!ホットスポット
hotspot2 0,0
hotspot2 shelfWidth, 0
hotspot2 shelfWidth, shelfDepth
hotspot2 0, shelfDepth